
Lightroom Classic Plugin

META Engine Setup Guide
Complete setup in 10–15 minutes
Contents
- Create an AI API Key
- Choose Your AI Provider
- OpenAI API Key Setup
- Google Gemini API Key Setup
- Install META Engine in Lightroom Classic
- Configure META Engine Settings
- First Test Run
- Important Rules and Edge Cases
- Lightroom Export Issue: Keywords Not Included
- Troubleshooting
- After Setup
Quick Start Checklist
- ☐ Choose an AI provider: OpenAI or Google (Gemini)
- ☐ Create an API key
- ☐ Add billing and set spending limits (recommended)
- ☐ Install META Engine into Lightroom Classic
- ☐ Paste your API key into META Engine settings
- ☐ Run a 1-photo test
- ☐ Tune resolution and metadata settings for your workflow
1. Create an AI API Key
Easiest Method: Use AI as Your Guide
If API setup feels intimidating, don’t guess. Use ChatGPT or Gemini as a guided assistant. Copy and paste this prompt:
Prompt to copy:
I’m setting up META Engine (a Lightroom Classic plugin) and I need an API key.
Please guide me step-by-step to:
- Create an API key for [OpenAI or Google Gemini]
- Enable billing / add a payment method
- Set a monthly spending limit if available
- Confirm the key is active
I’m on [macOS or Windows]. Please be detailed and use plain language.
Follow the steps once, then you’re done.
2. Choose Your AI Provider
META Engine supports OpenAI and Google Gemini.
- OpenAI — Simplest setup, widely used documentation
- Gemini — If you already use Google Cloud or prefer that ecosystem
Cost and performance depend on the model you select and your settings.
3. OpenAI API Key Setup
Step 1: Create an OpenAI account
Sign in to OpenAI’s platform.
Step 2: Create an API key
- Go to API keys
- Create a new secret key
- Copy it immediately and store it safely (you may not be able to view it again)
Step 3: Add billing
- Add a payment method
- If available, set usage limits or alerts
Step 4: Keep your key safe
- Do not share your key
- Do not paste it into public posts
- If it leaks, revoke it and create a new one
What you will paste into META Engine is the secret key string.
4. Google Gemini API Key Setup
Option A: Google AI Studio (simple)
- Go to Google AI Studio
- Create an API key
- Enable billing if required by your usage level
- Copy the key and store it safely
Option B: Google Cloud project (more control)
- Create a Cloud project
- Enable the Gemini API
- Create credentials (API key)
- Set budgets and alerts in Cloud Billing
Same rule: never share the key. Revoke and reissue if exposed.
5. Install META Engine in Lightroom Classic
Step 1: Download the plugin
Get the latest META Engine plugin from the official download link.
Step 2: Prepare the plugin folder
⚠ Important for Mac users: The plugin folder must end with .lrplugin (e.g. META_Engine.lrplugin). If you downloaded a zip, unzip it and rename the folder to include this extension. Windows users can use any folder name.
Step 3: Install in Lightroom Classic
File→Plug-in Manager- Click Add
- Select the META Engine plugin folder
- Confirm it is enabled
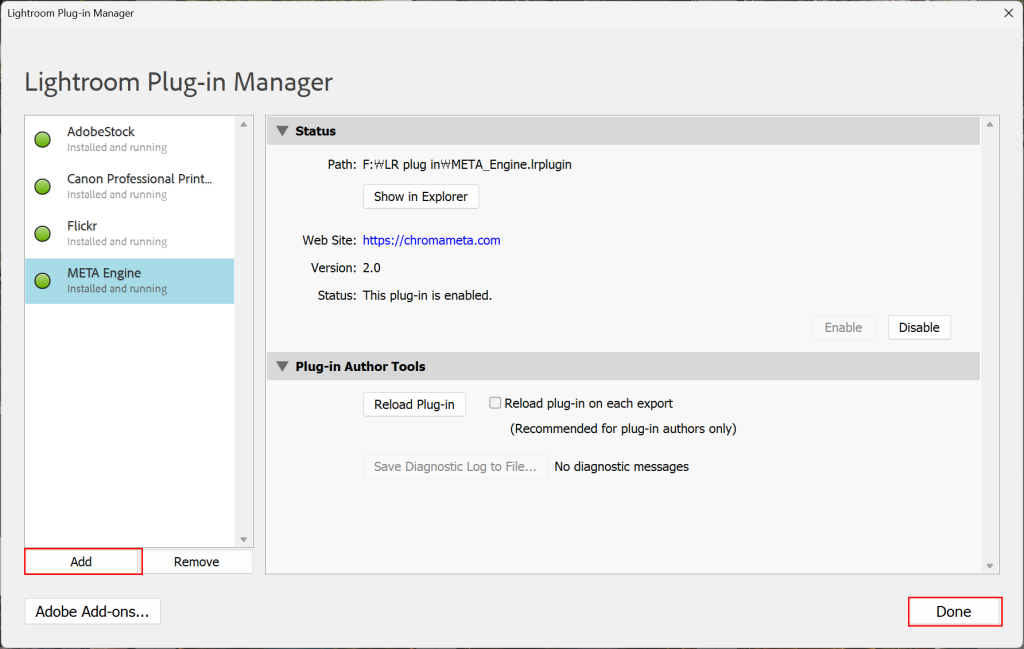
Step 4: Confirm it loads
META Engine should appear listed and active in Plug-in Manager. If Lightroom reports the plugin is blocked or not loaded, restart Lightroom Classic once.
6. Configure META Engine Settings
Open settings via:Library → Plug-in Extras → META Engine - Settings
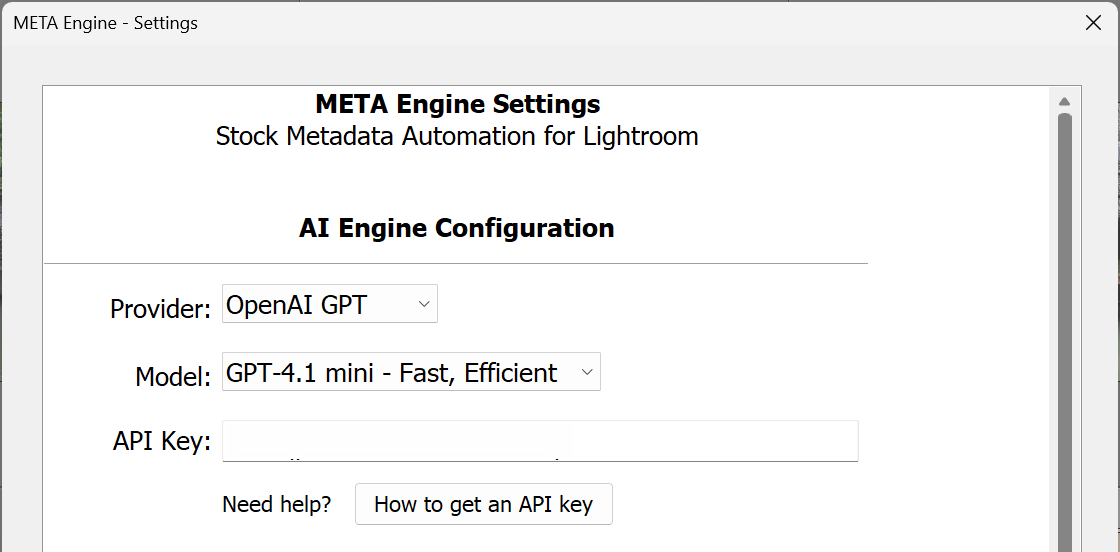
A) AI Provider
Select OpenAI or Google Gemini, then paste your API key.
If requests fail, the most common causes are:
- Billing not enabled on your API account
- Invalid or revoked key
- Network/firewall blocking API requests
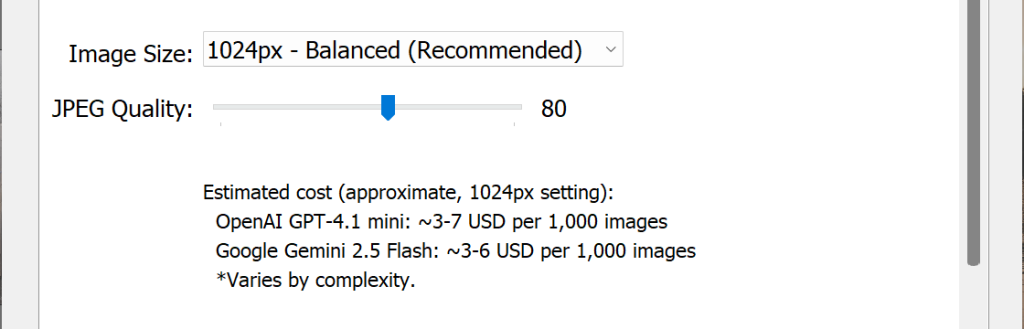
B) Image Settings
These control speed, cost, and analysis depth.
Recommended starting point:
- Image Size: 1024px (balanced)
- JPEG Quality: 70–80
Lower settings = cheaper and faster. Higher settings = potentially more accurate scene interpretation. Higher settings also increase the data sent to the AI provider, which can increase usage cost.
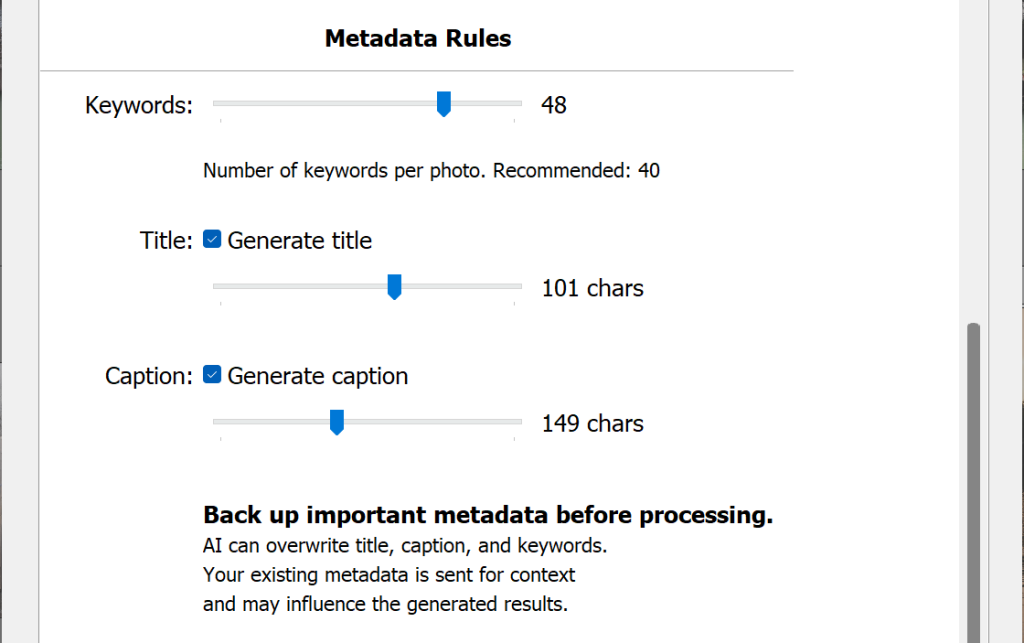
C) Metadata Rules
Keywords are always generated. This is the core function of META Engine. Use the slider to set the target number of keywords per photo.
Title and Caption can be toggled ON or OFF independently:
- ON — AI generates and overwrites the field. Use the slider to set the maximum character length.
- OFF — The field is left untouched. Existing metadata is preserved.
Recommended for stock photography workflow:
- Keywords: ~40 per photo
- Title: ON, max ~100 characters
- Caption: ON, max ~140 characters (or OFF if your platform doesn’t require it)
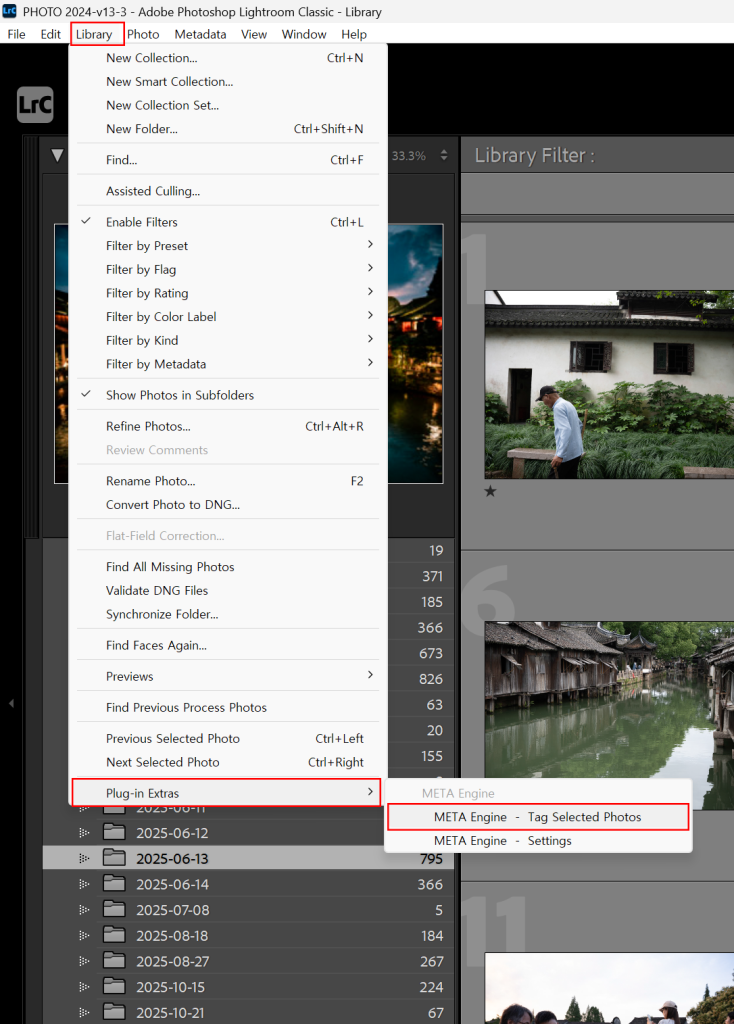
7. First Test Run
- Select 1 photo in Library
- Run
Library→Plug-in Extras→META Engine - Tag Selected Photos - Confirm keywords appear in the Keyword panel
- If Title/Caption are enabled, confirm those fields are filled
If it fails: confirm your API key is correct, billing is enabled, and you have internet access.
8. Important Rules and Edge Cases
Rule 1: Back Up Important Metadata First
⚠ If you have important Title, Caption, or Keywords written manually, back them up before running large batches. META Engine can overwrite these fields depending on your toggle settings.
Recommended: create a Lightroom metadata backup or test on a small set first.
Rule 2: Title and Caption Are Optional — Keywords Are Not
Title and Caption can be toggled ON or OFF in settings. If you want to preserve your existing Title or Caption, turn OFF the corresponding toggle. META Engine will generate keywords only.
Rule 3: Existing Metadata Is Sent to AI as Context
If a photo already contains Keywords, Title, or Caption, META Engine sends that metadata along with the image to the AI model. The AI will attempt to incorporate your existing content.
However, the AI may rephrase, reorganize, or not preserve exact wording. If exact wording matters, disable Title/Caption generation or back up your metadata first.
Rule 4: No Preview Step
META Engine writes metadata directly into Lightroom fields. There is no preview-before-apply stage. For first-time use, test on 1–2 photos before processing larger batches.
Rule 5: Internet Connection Required
META Engine communicates with your selected AI provider to generate metadata. An active internet connection is required.
9. Lightroom Export Issue: Keywords Not Included
⚠ This is not a META Engine issue. This is caused by Lightroom’s own keyword export settings.
If keywords are generated correctly but missing from exported files, the cause is usually Lightroom’s Include on Export property.
How to fix:
- Open the Keyword List panel in Lightroom Classic
- Right-click on the affected keyword
- Open Edit Keyword Tag
- Enable Include on Export

This is a catalog-level keyword property that may have been set long ago and is unrelated to META Engine.
Best practice: Audit your Keyword List once and ensure the keywords you rely on have Include on Export enabled.
10. Troubleshooting
“Invalid API key”
- Verify no extra spaces when pasting
- Confirm you’re using the correct provider
- Reissue the key if needed
“Billing required”
- Add a payment method to your API account
- Check your provider’s billing status
- Wait a few minutes after enabling billing
“Network error / timeout”
- Confirm internet access
- Check VPN or firewall settings
- Try again with lower image resolution
“Works for 1 photo but fails on large batches”
- Lower image resolution
- Process in smaller batches
- Check your provider’s rate limits
11. After Setup
You can now work in the intended flow: Select → Run → Done.
Trial Mode
You can process up to 50 photos for free. After the limit, generation is paused until you activate a license.
Full License
Purchase a license, then enter the key in META Engine Settings and click Activate.